Thursday, September 12, 2013

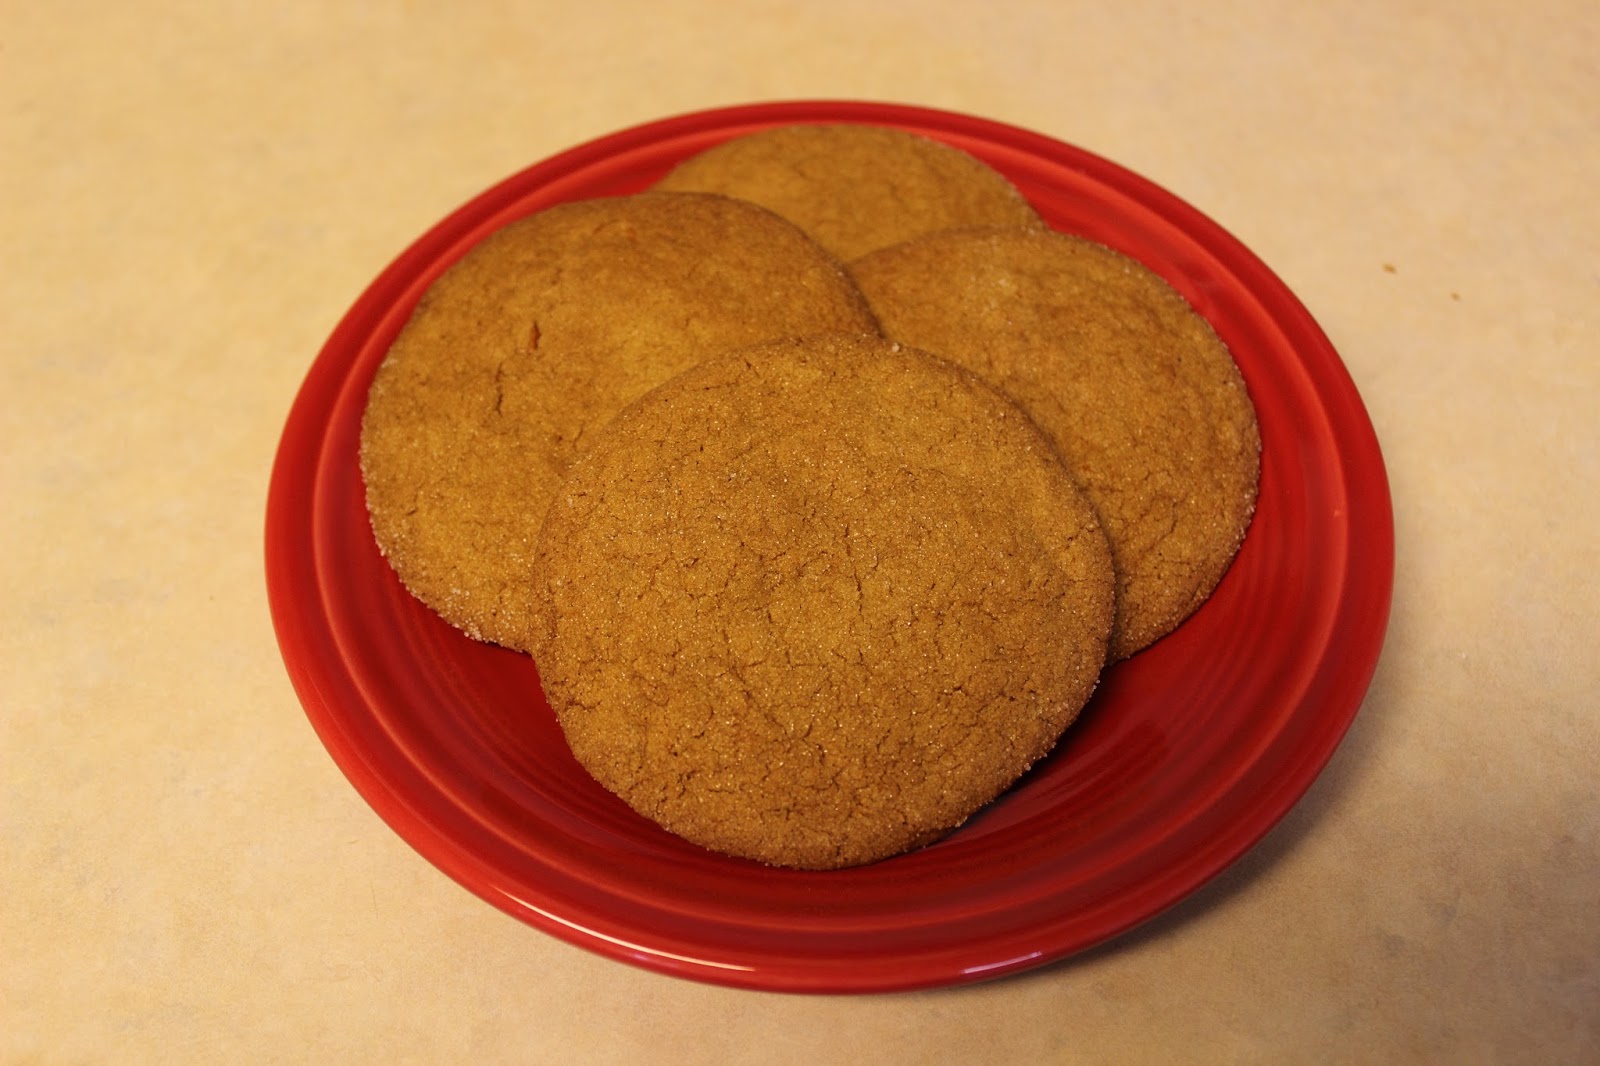
Orange Ginger Wafers


Let's face it - finding new, tasty cookie recipes is difficult. Dare I even say, daunting? It is even worse if you are a health conscious person, because every diet has wiggle room for desserts, but not if they're going to be colossal saturated fat or sugar bombs. This tasty, delicate cookie registers with only about 1.5 grams of fat apiece; that factors in to roughly 8% of your DV for saturated fat - and best of all, not all of the fat comes from butter. Heart healthy canola oil is used in this recipe, too. 

That being said, the best part of these is the deep, spicy flavor from ginger and cloves, plus the smoky hint of molasses. Fresh orange and lemon zests perk up the flavor immensely and are most noticeable in the aftertaste; this is accentuated by a good cup of coffee. These are super easy to make, and they're sure to disappear quickly. Might I suggest making a double, if not triple, batch?

Orange Ginger Wafers

3 tbsp. canola oil (or other neutral flavored oil)
2½ tbsp. unsalted butter, softened
1 large egg
¼ cup light or dark molasses
2½ tsp. pure vanilla extract
2½ tsp. finely grated orange zest
1 tsp. finely grated lemon zest
1 cup sugar
2 cups flour
2 tsp. baking powder
¼ tsp. baking soda
½ tsp. ground ginger
1/8 tsp. ground cloves
¼ tsp. kosher salt
Granulated sugar (for dipping)

In the bowl of a stand mixer fitted with the paddle attachment, combine the sugar, citrus zests, canola oil and butter. Beat on medium speed until all the ingredients are well blended. Add the egg, molasses and vanilla and mix until the mixture is uniform.

Sift together the flour, baking powder, soda, ginger, cloves and salt. Gradually beat the flour mixture into the molasses mixture until everything is well blended and smooth. At this point, cover the bowl with plastic wrap or aluminum foil and refrigerate for at least 6 hours, but overnight is best.

When ready to bake, preheat the oven to 375 degrees. Grease two cookie sheets with nonstick cooking spray.

Using a small cookie scoop, roll the dough into generous ¾" balls. Space about 2¼" apart on the sheets. Lightly oil the bottom of a large, flat-bottomed glass. Very lightly dip the glass into granulated sugar, then flatten the dough balls until about ¼" thick, dipping the glass into the sugar before flattening each cookie.

Wipe any buildup from the glass and re-oil as necessary. Bake, one sheet at a time, until the cookies are faintly tinged with brown and slightly darker at the edges, between 8 and 11 minutes; rotate the sheet halfway through baking for even browning.

Remove the sheet to a rack and let stand until the cookies firm slightly - they tend to stick to the sheets a little if you try to take them off right away. Transfer the cookies to racks to cool. Make sure to let the cookie sheet cool between batches, or else the cookies will spread too much.

Makes about 4½ dozen 2½" wafers

Sunday, August 18, 2013

Red Onion Dip


I don't think I have to even say the phrase "onion dip" without the image of the traditional onion soup mix thrown into sour cream entering your mind, do I? Sure, the regular version tastes good enough, but this version, while requiring a little bit of work, is a vast improvement upon the original. Fresh red onions are combined with savory garlic, thyme, and surprisingly enough, fresh ginger to create a dip that will easily become a hit at your next party. You may want to make a double batch, though, because this is going to disappear quickly.

Red Onion Dip

2 - 3 small red onions, finely chopped (around 2 cups)
2 cups beef stock
1½ tbsp. minced peeled fresh ginger
3 cloves garlic, finely minced
1 tsp. fresh thyme leaves or minced fresh parsley, or a scant ½ tsp., dried
1 tsp. balsamic vinegar
1 cup sour cream
Kosher salt
Freshly ground black pepper

In a large nonstick skillet over medium-high heat, stir together the onions, beef stock, ginger, garlic, thyme, salt and pepper. Bring it to a boil, stirring, until almost all of the stock has been absorbed by the onion. Watch it carefully at the end so that the mixture doesn't burn. Remove it to a bowl and stir in the balsamic vinegar. Let it cool completely, then stir in the sour cream. Serve slightly or fully chilled with sturdy chips, crackers or pretzels for dipping.

Makes about 2 cups

Tuesday, August 13, 2013

Spiced Coffeecake with Oil (Reduced Fat and Egg Free)


I've been in the mood to try some new recipes, so here is my latest foray. This particularly flavorful coffeecake is ridiculously simple to make, and chances are, you may have a good majority of the ingredients already on hand. Redolent with the fresh taste of orange, and seasoned with a good amount of cinnamon, this moist cake is made without butter or full fat dairy products. It's reasonably low in sugar and is perfect at breakfast, as a mid-afternoon snack, or an after dinner dessert. It is dense, most and can be served either warm (with a scoop of good quality frozen vanilla custard or gelato) or at room temperature. Any way you slice it (Get it? A little baker's humor...), this cake will be making its way into your rotation. Please note that there is a streusel that goes on top of this cake, but it is very dense and ends up sinking into batter - this is normal.

Spiced Coffeecake with Oil (Reduced Fat and Egg Free)

Cake:

1 cup flour
2/3 cup sugar
¾ tsp. baking soda
½ tsp. ground cinnamon
¼ tsp. ground nutmeg
¼ tsp. kosher salt
1/3 cup nonfat or low-fat yogurt (you can use Greek yogurt)
1/3 cup freshly squeezed orange juice
3 tbsp. vegetable oil (or any other neutrally flavored oil)
2 tsp. grated orange zest
1 tsp. pure vanilla extract

Streusel:  

1/3 cup Grape Nuts cereal
1/3 cup finely chopped walnuts or pecans 
1/3 cup packed light brown sugar
2 tbsp. flour
1 tsp. ground cinnamon
1 egg white
1 tbsp. vegetable oil (or any other neutrally flavored oil)
¼ tsp. pure vanilla extract

In a large bowl, whisk together all the dry ingredients. In a separate bowl, whisk together all the wet ingredients. Pour the wet mixture over the dry and stir just until the dry ingredients are moistened. Do not overmix; the batter will not be smooth. Scrape the batter into a greased 8 x 2" round pan and spread evenly. Cover with the streusel as evenly as possible. Bake at 350 degrees until a toothpick inserted in the center comes out clean, about 25 to 30 minutes. Let cool in the pan on a rack for 5 to 10 minutes before unmolding to cool completely on the rack (optional). You may also let the cake cool directly in the pan and serve from there.

To make the streusel, combine the cereal, nuts, sugar, flour and cinnamon. In a separate bowl, beat the egg white with the oil and vanilla. Stir the egg white mixture into the cereal mixture with a fork; it will be very sticky and difficult to add evenly to the cake, but be patient. The final reward is worth it!

Cake serves 8, and the streusel yields around 2 cups' worth

Wednesday, July 17, 2013

All'arrabbiata di Berray


Sometimes you just walk into the grocery store and don't know what to get for dinner. Am I right? Of course I am. This recipe was born from my complete boredom with dinner ideas. Prep time is just about nonexistent, flavors are bold and punchy, and by using a jarred sauce, it cuts cooking time down greatly. This sauce is moderately spicy, and is redolent of Italy with its prominent oregano and basil notes. Feel free to use your favorite noodle, but I recommend one to which the sauce will really cling - like penne, rotini, campanelle, etc. You may certainly use long noodles, but make sure they are thicker - think linguine, fettucine, thick spaghetti... You can also use gluten-free noodles, or low carb...this is a pretty forgiving and customizable recipe. Best of all...this is a healthy dish. Doesn't look like it, though!

All'arrabbiata di Berray

1 medium onion, diced
1 lb. ground chicken (or supreme lean ground beef)
½ - ¾ tsp. crushed red pepper flakes
1 tsp. dried oregano
½ tsp. dried basil
½ tsp. freshly ground black pepper
24 oz. jar roasted garlic pasta sauce
Extra virgin olive oil
8 - 12 oz. penne noodles (I use Dreamfield's low carb noodles)

Heat a large saucepan over medium heat. Add 1 to 2 tbsp. extra virgin olive oil, swirl to coat the bottom of the pan, then add the diced onion. Cook the onion until it is translucent; this will take about 5 - 7 minutes or so. Add the crushed red pepper flakes and briefly cook for another minute. 

Add the ground chicken to the pan and break it down into small pieces. Cook the chicken completely through. You can make the sauce chunkier or smoother, based on personal preferences. Keep in mind at this point, if you are using the leanest meat possible, you will not have to drain it. If you don't want any extra juices in there, just spoon the liquid out.

Crush the oregano and basil between your fingertips and add both to the onion. Add the black pepper and mix everything together well. Add the entire jar of pasta sauce to the pan and stir to combine. Bring the sauce to a low boil, then reduce to a simmer over low heat while you prepare the noodles.

In a pot of boiling, salted water, cook the noodles according to the package directions. Drain well, then add the noodles into the sauce, stirring well to coat the noodles with the sauce. Serve immediately with a bit of freshly grated Parmesan on top, some good crusty artisan bread on the side, and a medium to dry red wine of your choice.

Serves 4

Tuesday, July 16, 2013

Fresh Strawberry Ice Cream (Reduced Sugar)

 
Summer is truly here, and with it comes the glut of berries at the grocery stores. Strawberries usually arrive first, followed by the blueberries and raspberries, and this recipe is the perfect way to use up those leftover strawberries you may have. This ice cream is light, delicately sweet, and packs a wallop in the pure strawberry flavor. If possible, try to use organic dairy and strawberries.
 
Fresh Strawberry Ice Cream
 
1½ cups fresh strawberries, hulled
¾ cup whole milk
1/3 cup Truvia Baking Blend (or, 2/3 cup granulated sugar)
1½ cups heavy cream
1½ tsp. pure vanilla extract
Pinch of kosher salt
 
Put the strawberries into the bowl of a food processor fitted with the chopping blade. Pulse the strawberries until rough or finely chopped, depending on your personal preferences. Reserve the strawberries.
 
In a medium bowl, use a hand mixer on low speed or a whisk to combine the milk, sugar and salt until the sugar is dissolved. Stir in the heavy cream and vanilla. Stir in the reserved strawberries with all the juices. Cover and refrigerate 1 to 2 hours, but overnight is best.
 
When ready to make the ice cream, stir up the mixture gently, then pour into your ice cream maker and mix according to the manufacturer's instructions. I use a Cuisinart ice cream maker, and this is done in about 15 to 20 minutes. The ice cream should have a soft-serve consistency, and you can serve it at this point, but I prefer to spoon it into a container and let it firm up for a few hours. Make sure to remove the ice cream from the freezer about 10 to 15 minutes before serving.
 
Makes about 5 cups (10 ½-cup servings)


Tuesday, June 18, 2013

Cheesecake Ice Cream (Reduced Fat and Reduced Sugar)


Lately, the urge to make all sorts of ice cream has hit me, and now that I've got my own ice cream maker, the possibilities are endless. This is a very basic recipe taking the concept for one of my favorite things, cheesecake, and turning it into another one of my favorite things, which is, of course, ice cream. There are only 7 ingredients in it, and my version lightens things up just a tiny bit by reducing a little of the saturated fat by using Neufchâtel cream cheese and fat free sour cream, and cutting back on the sugar by using Truvia Baking Blend. There's no loss of flavor in using reduced fat ingredients here, but I wouldn't recommend using fat free cream cheese, as it might change the texture a little and cause more ice crystals to form, which is what tends to happen when nonfat dairy is used. This is excellent alone, but consider drizzling it with a from-scratch raspberry or mixed berry sauce, or perhaps some chocolate syrup.
 
Cheesecake Ice Cream
 
12 oz. Neufchâtel cream cheese, at room temperature, cut into 2" pieces
½ cup Truvia Baking Blend (or, 1 cup granulated sugar)
½ tsp. kosher salt
¼ cup mascarpone cheese, at room temperature
1 cup whole milk, at room temperature
¼ cup fat free sour cream (can also use full fat, or reduced fat)
2 tsp. pure vanilla extract
 
In the bowl of a stand mixer fitted with the paddle attachment, beat the cream cheese until it is very smooth. Gradually add the sugar and salt, beating until the mixture is uniform. Add the mascarpone and mix until well-combined. Slowly add the milk and vanilla, mixing until incorporated. On the lowest speed of the mixer, add the sour cream and blend until everything is totally fluid and smooth.
 
Note that cream cheese can be notoriously difficult to work with, even when at room temperature. You may end up with tiny lumps of cream cheese even if it's really been well beaten. What you will want to do at this point is pour the mixture through a fine strainer into another bowl, and eliminate the lumps. This is the only way you will ensure your final product will be incredibly smooth and creamy.
 
When you have strained the mixture and removed all particles, cover the bowl and refrigerate 1 to 2 hours, or overnight. It's personal preference that overnight is better.
 
When you are ready to make the ice cream, turn on your ice cream maker and pour the mixture into the frozen freezer bowl and mix until thickened - usually about 15 to 20 minutes. The ice cream will have a soft and creamy texture. If you like it at the soft serve stage, serve the ice cream immediately. If a firmer consistency is desired, transfer the ice cream to an airtight container (cannot stress this enough) and place in the freezer for about 2 hours, or until ready to serve. Remove from the freezer about 15 minutes before you're ready to serve it.
 
Consider drizzling a fresh, homemade raspberry sauce on top of each serving, or perhaps drizzle on some chocolate sauce. You could even try adding small chocolate chunks to the mixture about 5 minutes before it's done, for some added decadence.
 
Makes about 5 cups (10 ½-cup servings)

Wednesday, May 22, 2013

Chocolate Sriracha Ice Cream


For those that want to put some spice back into their lives...this recipe is most definitely for you. This delectable, supremely spicy ice cream is a severe punch in the mouth. Loaded with big, bold flavors, if you've a weak constitution, I strongly suggest staying away from this and go check out your normal run-of-the-mill chocolate ice cream. This recipe is not only gluten-free, it's also refined sugar-free and vegan-friendly. It's also ridiculously simple to make, and takes hardly any time at all. Please note that this recipe is meant for an ice cream maker. If you do not have one, you may certainly try making this recipe without it, but bear in mind the end result will definitely not be the same; it might end up being more crystallized and not as smooth as a churned product. This ice cream is also very, very rich, so a single scoop should be more than enough for you.

Chocolate Sriracha Ice Cream

3 tbsp. cocoa powder
½ tsp. ground cinnamon
2 tsp. Sriracha (or less, to taste - I do not recommend more)
2½ tbsp. pure maple syrup (Grade A)
1 can (15 oz.) full fat coconut milk (do NOT use reduced fat)

In a medium bowl, whisk together the cocoa powder, cinnamon, Sriracha, and maple syrup until it is mostly smooth. Gradually add the coconut milk in roughly 2 tbsp. increments, constantly whisking, to ensure the mixture stays smooth.

Place the bowl in the freezer and let it chill for about 25 minutes.

Add the mixture to your ice cream maker and process until it is of the consistency you prefer (soft serve, or a little firmer). If you want a firmer ice cream, scoop it into a container and place in the freezer until you reach the desired consistency. Otherwise, serve immediately from the ice cream maker if you want the soft serve type.

Serves 4

Saturday, April 6, 2013

Quinoa Tabbouleh


 Yes, I'm back and no, I'm not dead. Life just gets in the way sometimes. I'm starting off April on a clean and healthful note, so here is a great, quick and tasty recipe for a dish that could function as a side salad, or as a main course for four. It's vegan/vegetarian friendly, gluten-free, has no refined sugars, and is chock full of healthy vegetables. Since quinoa is a seed and not a true grain, you could have this if you are following a low carb diet; just eat it in moderation. I used organic quinoa, but I can't claim this dish fully organic since all of the produce was most definitely not organic. Consider serving this with grilled meats this summer. If you just want to make up a big batch of it and eat it throughout the course of the week, more power to you. It's got healthful protein in it, and more than your daily requirement of fruits and vegetables.

Quinoa Tabbouleh

2 cups water
1 cup quinoa
1 pinch of kosher salt
¼ cup extra virgin olive oil
½ tsp. sea or kosher salt
¼ cup freshly squeezed lemon juice
3 plum tomatoes, seeded and diced
1 hothouse cucumber, diced
2 small bunches of scallions, diced (more or less, to taste)
2 carrots, peeled and grated
1 cup fresh Italian flat leaf parsley, chopped (more or less, to taste)

In a medium saucepan, bring the water to a boil. Add the quinoa and a pinch of kosher salt. Reduce the heat to low. Cover and simmer for 15 minutes. Remove from the heat and allow to cool to room temperature. Fluff the quinoa gently with a fork.

In a large bowl, combine the olive oil, sea (or kosher) salt, lemon juice, tomatoes, cucumber, scallions, carrots and parsley. Stir in the cooled quinoa and serve at room temperature. You can also chill the tabbouleh and serve it cold, if desired.

Serve with pita bread on the side, if you wish.

Thursday, January 24, 2013

Sapphire Cosmopolitan


Forget making cosmopolitans with vodka - that stuff tastes like swill, anyway! Here's an upscale recipe for the traditional cosmopolitan using fine Bombay Sapphire gin. Just a word of warning - these are extremely potent and will quickly knock you on your ass if you're not careful! 

Sapphire Cosmopolitan

3 parts Bombay Sapphire gin
2 parts premium orange liqueur (Cointreau or Grand Marnier)
2 parts 100% cranberry juice
1 part freshly squeezed lime juice (do NOT sub with the bottled stuff)

Pour the ingredients into a shaker filled with ice. Shake thoroughly and strain into a chilled martini cocktail glass. Garnish with an orange or lemon peel before serving.

Makes 1

Dainty Orange Drop Cookies


I'll admit it freely - I'm a cookie connoisseur and a snob. I really don't care for any of the newfangled recipes coming out these days, especially when it comes to holiday cookies. I prefer to use the old, tried and true recipes from the 1930s and 1940s, and lo and behold, they always turn out beautifully and everyone loves them. 

This particular recipe is for a small, but very flavorful cookie. It's soft and chewy, redolent of fresh orange, and has some interesting textural ingredients - corn flakes, dates, and chopped nuts. It might not sound all that appealing, but they're super delicious. I'm a huge fan of citrus in baking; it creates such a wonderful flavor profile, and usually you can taste it most in the aftertaste. These are an easy cookie to make, but do beware. They have a tendency to stick to the cookie sheets even if you grease them. They also tend to brown very quickly, so make sure to rotate your cookie sheets halfway through baking so everything is baked evenly.

Dainty Orange Drop Cookies

½ cup unsalted butter
1 cup sugar
2 eggs
2 cups flour
1 tsp. baking powder
1½ cups corn flakes, crushed
½ cup dates, pitted and chopped
½ cup walnuts, chopped
Grated rind of ½ an orange
Juice of ½ an orange

In the bowl of a stand mixer fitted with the paddle attachment, cream the butter and the sugar until light and fluffy. Make sure to scrape the sides and bottom of the bowl to make sure everything is well incorporated.

Add the eggs and the orange zest. Beat well.

Sift the flour and baking powder together. Add to the creamed mixture along with the orange juice. Add the corn flakes, dates and nuts. Mix well until everything is incorporated. Chill the dough for an about an hour; the cookie dough tends to be a bit loose right after it's made.

Using a small cookie scoop, drop onto greased cookie sheets. Bake at 350 degrees for 12 - 15 minutes, or until the cookies are golden brown. Remove the cookies to cooling racks and let cool completely. Place in a tin lined with waxed or parchment papers, and top with an additional piece of waxed or parchment papers. Slip in a piece of sandwich bread to help the cookies to stay soft and make sure the lid fits tightly.

Makes about 4 dozen

Sunday, January 20, 2013

Fruit, Ham and French Bread Pizza


Sometimes you want all the flavors of a pizza, but don't want to put forth the effort to craft your own, and sometimes, you're too lazy to even call for delivery. This ridiculously simple recipe solves all your problems. It's toasty, cheesy, saucy...but it's all on small baguettes instead of being pizza-shaped. Everything comes together very quickly and can be on the table in less than half an hour. It's also versatile - feel free to swap in the cheese(s) and vegetables of your choice. Allow one slab per person, and if serving a crowd, slice into modest portions. Since this is so easy, it can easily be multiplied to suit your needs - just make sure you've got the oven space and a couple of helpers with you to get these together quickly, as it can be slightly time consuming if just one is making these.

Fruit, Ham and French Bread Pizza

2 small baguettes
1¼ cups pizza sauce (preferably one with herbs in it)
½ lb. lean sliced cooked ham
4 canned pineapple rings, drained and chopped
½ a small green bell pepper, seeded and cut into thin strips
2 oz. reduced fat aged Cheddar cheese (I used mozzarella)
Kosher salt
Freshly ground black pepper

Preheat the oven to 400 degrees. Cut the baguettes in half lengthwise and toast the cut sides until crisp and golden.

Spread the pizza sauce over the toasted baguettes. Cut the ham into strips and lay on the baguettes with the pineapple and green pepper. Season to taste with salt and pepper.

Grate the cheese and sprinkle on top.

Bake for 15 - 20 minutes, until crisp and golden.

Serves 4

NOTE:  You can substitute lean cooked chicken, cooked peeled shrimp, or flaked tuna in place of the ham.

Fettucine con Crema di Aglio e Peperoncino


Let me set the record straight. This dish is ONLY for serious garlic lovers. Why? This potent pasta packs a whopping SIX whole heads of garlic into it. No, that is not a misprint. Don't worry, however. The garlic is roasted so the sharp, spicy and pungent bite is mellowed and tamed. It becomes deliciously soft, nutty and sweet in a slow roasting process. This dish also features a double punch with the spicy addition of cayenne pepper. Feel free to add as much as you want - just be mindful if you're serving this to guests who may not enjoy searing heat as much as you. This dish can be made with regular, gluten-free or any low carb fettucine/linguine. If you want extra spice, top each serving with a sprinkling of crushed red pepper flakes (as shown above).

Fettucine con Crema di Aglio e Peperoncino

6 whole heads garlic
1¼ lb. fettucine
6 tbsp. extra virgin olive oil
Kosher salt
¼ - ½ tsp. cayenne pepper (or more, to taste)

Preheat the oven to 350 degrees. Wrap each head of garlic separately in foil. Place the parcels on the center rack of the oven and bake 45 minutes. Remove the garlic heads from the oven and set aside to cool slightly so they can be handled.

Unwrap the garlic heads, separate the cloves, and squeeze the garlic cloves from their papery sheaths into a hot serving bowl. This process takes awhile, so make sure you have not started cooking your pasta at this point. Add the olive oil and season to taste with kosher salt. Sprinkle with the cayenne pepper and blend together well with a fork.

In a large pot of boiling, salted water, cook the pasta according to the package directions until al dente.

Drain the pasta and transfer it to the serving bowl. Toss the pasta with the sauce and serve immediately.

Serves 6

Saturday, January 12, 2013

15 Minute Chili Cheeseburger Skillet


15 minutes? No way. Yes way, 15 minutes. This delightfully quick and oddly satisfying skillet meal will make everyone happy, from kids to adults. There's an extremely short list of ingredients and hardly any prep work. This recipe is supposed to use broccoli, but obviously, based on my photo, I used peas (forgot to pick up the broccoli!). Regular chili powder is used for a lot of flavor, but if you'd like a little heat, or go for a more smoky flavor, try adding a little chipotle chili powder or even a little pimentón (smoked paprika). You can easily play with this recipe and tweak it enough to make it your own, but make it once following my recipe to see how you like it before you make changes. This is my first post of 2013, and I promise I'll try to be a little more active here this year!

15 Minute Chili Cheeseburger Skillet

1 lb. supreme lean ground beef (93/7 split)
2 cups water
1 package (7.25 oz.) Kraft Macaroni and Cheese Dinner
1 tsp. chili powder (or more, to taste)
3 cups chopped broccoli
¼ cup ketchup

Brown the meat in a large skillet, then drain it completely. If needed, wipe out any residual fat using a paper towel.

Return the meat to the skillet. Stir in the water, macaroni and the chili powder. Bring to a boil, then reduce to a simmer. Cover and let simmer for 5 minutes, stirring twice. I found that it needs to be stirred rather frequently in order to keep the noodles from sticking to the pan; stir at your discretion.

After 5 minutes, add the broccoli. Simmer another 5 minutes or until the macaroni is tender. If the mixture seems to be dry, add a little more water. Stir in the cheese sauce mix and the ketchup until blended. Serve immediately.

Serves 4

Thursday, December 20, 2012

Kipfel


Kipfel are a very unusual cookie. They are similar to the Jewish cookie, hamantaschen, which are triangular cookies that hold a filling. This recipe features a rich dough base of butter and cream cheese. Its filling is reminiscent of old Hungarian recipes featuring nut fillings - in fact, these are called "kipfli" in Hungarian. The dough is rolled out thinly and cut into squares. The corners are pinched up to seal in the rich nut filling, and they bake into light, flaky and absolutely delectable little treats. They are quite rich, so only one or two should sate your sweet tooth. Also, if you're lucky...you may just have one or two cookies that split their seams and create what I call a "Necronomicon" cookie. If you don't understand the reference, watch "Army of Darkness" with Bruce Campbell, and you'll get it. This recipe does not make very many cookies, and you might find that you may want to make a batch and a half of the filling; the first time I made these, I ran out of filling before I was able to finish putting all the cookies together.

Kipfel

Dough:

1 cup unsalted butter, chilled
1 (8 oz.) package cream cheese (you can use reduced fat or fat free), at room temperature
2 cups flour
¼ tsp. kosher salt

Nut Filling:

1 cup walnuts, pecans or almonds, finely grated
1 tbsp. fine bread crumbs
½ cup sugar
1 tsp. cinnamon
1 tbsp. lemon juice
½ cup cream (you can use milk)

To make the dough, cut the butter into the dry ingredients, using a pastry blender. Add the room temperature cream cheese and blend well. Chill the dough until it is firm (times will vary based on your refrigerator). Prepare the nut filling while you are letting the dough chill.

To make the filling, combine all the ingredients in a small saucepan. Cook gently over low to medium heat, stirring constantly, until the mixture becomes thick. Take it off the heat and let it cool completely.

When the dough is firm, roll it out thinly (think about 1/8 - ¼" thick) on a floured canvas. Cut the dough into 3" squares - don't be embarrassed to use a ruler to help you measure the squares; it REALLY helps.

Fill the center of each square with a teaspoonful of the nut filling. If desired, you can use other fillings, such as puréed dried apricots, prunes, or thick marmalade or jam.

Bring the corners up to the center, forming a little peak. Press the seams together and place on ungreased cookie sheets.

Bake at 400 degrees for about 15 minutes, or until the bottoms are golden brown. Do not be alarmed if your cookies appear to have split at the seams; this is normal. Remove the cookies to a rack and let them cool a little. While they are warm, sprinkle with confectioners sugar.

Makes about 3 dozen


Nanaimo Bars


"Nanaimo Bars (NBs for short) are one of Canada's favorite confections. The beautiful city of Nanaimo, British Columbia, has claimed these squares as their own, telling us on their website that it all began when a Nanaimo housewife entered a recipe for chocolate squares in a magazine contest some 35 years ago. She called her recipe 'Nanaimo Bars' and when she won the contest, not only did her dessert become popular throughout Canada, so did the town they were named after."

Nanaimo bars are a rich, delicious treat. They are a three-layered dessert, featuring a crumb base, with a middle layer of a light custard buttercream, and topped with a glorious layer of semi sweet chocolate. Best of all, they are a no-bake confection, which means you can save time, energy and money making these. There are many, many recipes out there for Nanaimo bars, but this one can be considered a basic "standard" recipe. Do try to use Bird's Custard Powder in these instead of vanilla pudding powder - there is a difference. You can order Bird's Custard Powder online; I was able to buy some through World Market's website. 

Since these are very rich, just a little square will do. However, if you've a major sweet tooth, you may just go through these pretty quickly!

Nanaimo Bars

Base:

½ cup unsalted butter, at room temperature
¼ cup sugar
1/3 cup unsweetened cocoa powder
1 large egg, lightly beaten
1 tsp. pure vanilla extract
2 cups graham cracker crumbs
1 cup sweetened or unsweetened coconut (shredded or flaked)
½ cup walnuts or pecans, coarsely chopped

Middle:

1 cup milk

¼ cup heavy cream
1/3 cup sugar
2 tbsp. Bird's custard powder (or vanilla pudding powder)
2 egg yolks
1 tsp. pure vanilla extract
Pinch of salt

Top:

4 oz. semi sweet chocolate
¼ cup plus 2 tbsp. heavy cream

Butter or spray a 9 x 9" square pan with nonstick cooking spray.

To make the bottom layer, start by melting the butter in a small saucepan over low heat. Remove from the heat and stir in the sugar and cocoa powder. Gradually whisk in the beaten egg. Return the saucepan to low heat and cook, stirring constantly, until the mixture thickens (about 1 - 2 minutes). Remove from the heat and stir in the vanilla extract, graham cracker crumbs, coconut and the nuts. Press the mixture evenly into the bottom of the prepared pan. Cover with plastic wrap and refrigerate until firm (about 1 hour).

To make the filling, combine the milk and heavy cream in a medium saucepan.  Cook, stirring frequently, over medium heat until the mixture begins to simmer. Meanwhile, in a separate bowl, beat on high speed until thick and pale yellow the sugar, Bird's custard powder, the egg yolks and a pinch of salt. Gradually pour about ¼ of the milk mixture into the egg mixture, whisking constantly. Scrape the egg mixture back into the pan with the milk and cook over medium heat. Whisking constantly, cook until the mixture is thickened and begins to bubble. Continue to cook and whisk vigorously for another 1½ minutes. Remove from the heat and stir in the vanilla extract. Pour everything over the prepared crust and put it in the refrigerator to cool completely and thicken; this may take a few hours.

To make the top layer, chop the chocolate into small pieces. Then, in a heatproof bowl set over simmering water (a double boiler), melt the chocolate and heavy cream. Stir well so the ganache is very smooth. Let the ganache cool to about 85 degrees before applying to the custard layer. Pour the ganache over the custard, gently spread it to the corners (this can be tricky), and put it back in the refrigerator for about 30 minutes to firm up slightly before serving. As a note, because this is a ganache topping, it will NEVER harden fully. This is normal, and will also ensure that you won't get any of the dreaded cracking when you slice the bars.

Makes about 25 squares

NOTE:  The picture featured here is of Nanaimo Bars NOT made using this particular recipe; I used a different one and encountered so many problems with it, that I did not want to share that one with you. This recipe shown here will ensure perfect results.

Monday, December 17, 2012

Orange-Chocolate Dipped Biscotti


I'm reprising a recipe already featured on this blog, but since it's the holidays, I'm doing something special with this. This features my Classic Biscotti with one end coated in delicious orange chocolate with bits of almonds in it. I will not show the recipe again here, but if you need a refresher, please head over to my Classic Biscotti (Reduced Fat) page.

The only special thing you will need is a few orange chocolate bars. I use the Lindt's Intense Orange chocolate bar, which is dark chocolate with the orange and the almonds. You should be able to find this at your local grocer in the candy aisle along with all the other chocolate bars. If you want to use a different type of orange chocolate, by all means, do so!


Break your chocolate bars (I needed two) into individual squares. Put them in a small bowl and put them in the microwave. Cook at 30 second intervals, stirring well each time, until the chocolate is melted; since you're not adding anything to keep the chocolate fluid, it's going to be slightly thicker.

Take a spoon and drip chocolate over one end of each biscotti, using the spoon to smear and spread the chocolate around the edges. Set each cookie either on a rack set over waxed paper to catch any drips, or simply lay them on a sheet of waxed or parchment papers. The chocolate will need some time to set up, so make sure they're in a place where they will be undisturbed for a few hours.

When the chocolate is dry, layer the biscotti into a tin, with each layer separated by waxed or parchment papers. Make sure the lid is on securely. Do not freeze these cookies; since the chocolate is not properly tempered, it will most likely develop a grey 'bloom' if exposed to extreme cold. Keep them in a cool, dry place until ready to eat.

Try dunking these in a hot cup of coffee on a cold winter's night...


Saturday, December 15, 2012

Orzo and Vegetables


Pasta, pasta, pasta! What could be more simple, yet fulfilling, than a hearty pasta dinner? What could also be better than an affordable, quick dinner, too? This simple recipe uses a small amount of ingredients, most of which can be picked up for probably less than $10 (minus the pecans, which are currently the second most expensive nut in the markets, behind macadamias). The recipe is basic enough that you can easily tweak it by adding more vegetables, herbs, other nuts, and lean cooked meats (like chicken breast or roasted shrimp). This is great for any meatless night you may have during the week. I know the recipe states "orzo" in the title, but for some dumb reason, my grocery store did not have any orzo on the shelves. So, the pasta shape you are seeing in the picture is the tiny pasta, acini de pepe. If you want a wine pairing for this meal, a good white wine would be your best bet, even if you add lean meat.

Orzo and Vegetables

2 cups orzo
2 - 3 tbsp. extra virgin olive oil
2/3 cup finely chopped onion
4 medium zucchini, cut into 2 x ½" pieces
2 cup fresh or frozen corn kernels
½ cup chopped pecans (if desired, you can toast them first)
1 tbsp. chopped fresh dill
Kosher salt
Freshly ground black pepper

Cook the orzo in a pot of boiling, salted water according to the package directions until al dente. Turn the orzo into a colander and set aside to drain.

Heat the oil in a large skillet. Add the onion and sauté until transparent. Add the zucchini, corn and ½ cup of water to the skillet. Cover and cook the veggies over medium heat about 5 minutes, or until just tender. Salt the vegetables lightly at this point - you don't want to cook out all the water from them before you mix in all the other ingredients.

Add the orzo, pecans and dill to the skillet and cook, stirring, until heated through. Stir in a little black pepper, about ¼ to ½ teaspoon.

Serve immediately on warmed plates and if desired, sprinkle with a little kosher salt and some fresh pepper.

Serves 4 - 6

Thursday, December 13, 2012

Pistachio Cookies


If you're looking for a cute little cookie to become part of your holiday baking repertoire, this recipe is sure to tickle your fancy. What could be more festive than green-tinted cookies at Christmastime? These cookies are very simple and don't require too many specialized ingredients, other than pistachios, and maybe pure almond extract. These little cookies are so good that you may just find yourself making them all year round instead of just at Christmas...

Pistachio Cookies

½ cup unsalted butter, softened
1 cup granulated sugar, divided
¼ cup canola oil
¼ cup water
1 egg
½ tsp. pure almond extract (NO IMITATION!)
2 (3.4 oz.) packages instant pistachio pudding
¼ tsp. kosher salt
1 tsp. baking powder
2¼ cups flour
2/3 cup chopped pistachios

Preheat the oven to 350 degrees.

In the bowl of a stand mixer fitted with the paddle attachment, cream the butter with ½ cup of the sugar.

Add the oil, water, egg and almond extract; mix well. Make sure to scrape down the sides and bottom of the bowl to make sure all the ingredients are well-incorporated.

In a separate bowl, combine pudding mix, salt, baking powder and flour. Gradually blend the dry ingredients into the wet, mixing just until all the flour disappears. Stir in the pistachios.

Shape level tablespoonfuls of the dough into balls; roll them in the remaining ½ cup sugar. Place the cookies 1 inch apart on parchment paper-lined cookie sheets. If you do not have parchment paper, do NOT roll the cookies in sugar; the sugar will burn onto your baking sheet and burn the bottom of your cookies. If not using the sugar, do grease your baking sheets well.

Bake for 15 - 18 minutes. Remove the cookies to a rack and let them cool completely.

Makes about 4 dozen

Saturday, December 8, 2012

Parsnip Purée


I know it's not often when I share a recipe for specifically a side dish, but this one might just become your new favorite instead of mashed potatoes. This simple, ridiculously cheap recipe combines both potatoes and parsnips to create a delicious, earthy side that pairs just like mashed potatoes - serve it alongside your roasts, chicken, etc. If you're wondering what a parsnip is, it's similar to a carrot in terms of appearance, but is white and tastes very similar to a carrot. Most grocery stores should carry parsnips, but if for some reason you can't get parsnips, substitute an equal amount of regular carrots. This will be a perfect side for your autumn feasts, particularly Thanksgiving. As a note, despite the addition of potatoes, this dish tastes mostly of the parsnips (the carrot profile). If this sounds like it may be too much of a carrot overload for you, simply use potatoes the whole way through.

Parsnip Purée

8 oz. baking potatoes, peeled and sliced thinly
1 lb. parsnips, peeled, halved, and cut in thick slices
Small piece of fresh peeled ginger (optional)
½ cup milk, light or heavy cream
1½ tbsp. butter, softened
½ tsp. kosher salt
¼ tsp. ground white pepper

Place the potato slices in a large saucepan. Add water to cover generously. Bring to a boil and cook for five minutes. Add the parsnips and continue cooking until both vegetables are completely tender, about 25 minutes.

Drain and return the vegetables to the pan. Working over low heat, mash the vegetables with a potato masher or beat with a hand-held mixer until very smooth.

Mix in the milk, butter, salt and pepper. Taste and adjust the seasonings and cook just until heated through. Serve piping hot. If desired, top with a beurre noisette or a cress butter. Snipped chives also make an appealing presentation.

Serves 4 - 6